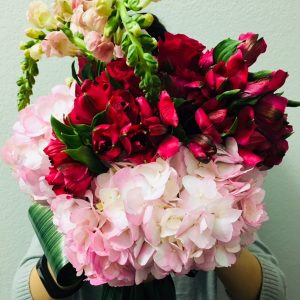
Sorry for the delay in posting. Life happens! I will start posting new images of my flower design creations from last year starting where I have left off in October 2018. Try these flower ideas from using a bunch of mix flowers to flower topiary and flowers in a box. I hope you enjoy these flower inspirations and go out and make some for that special person in your life.
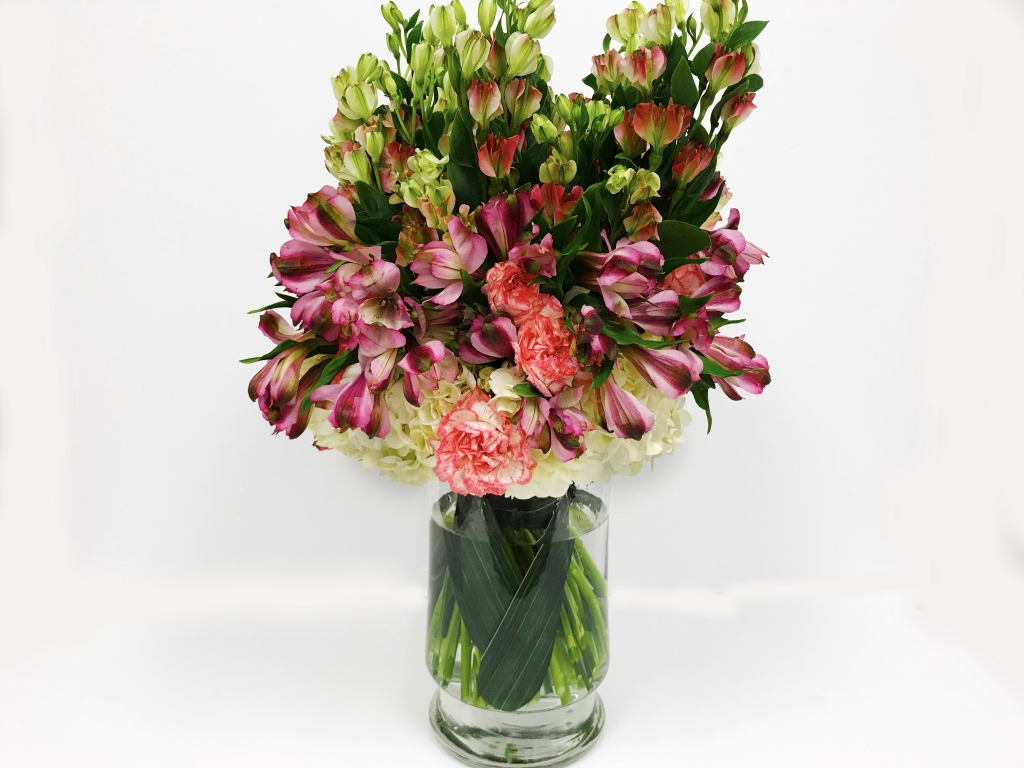
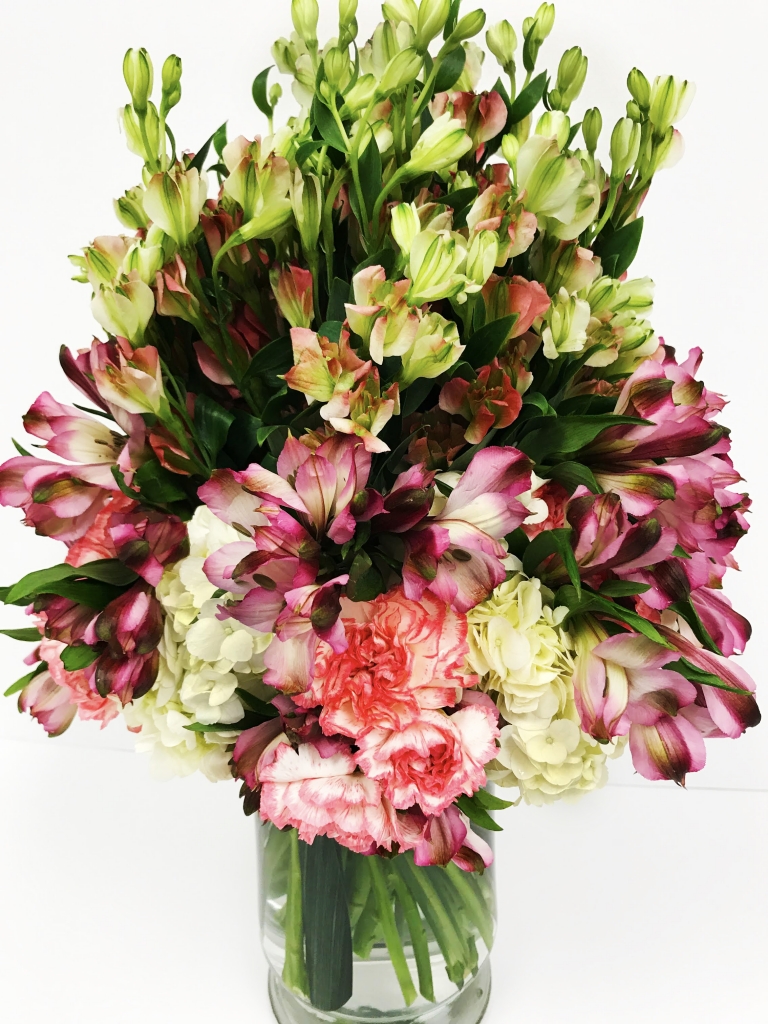
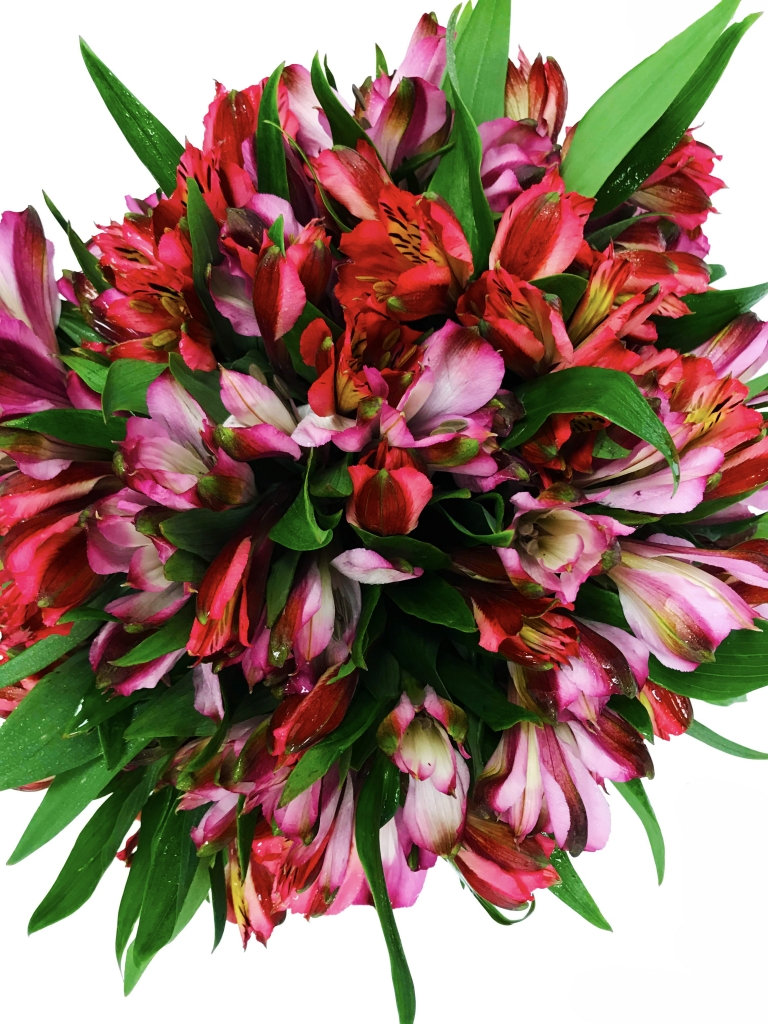
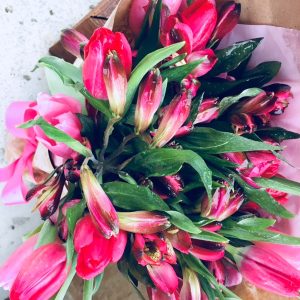
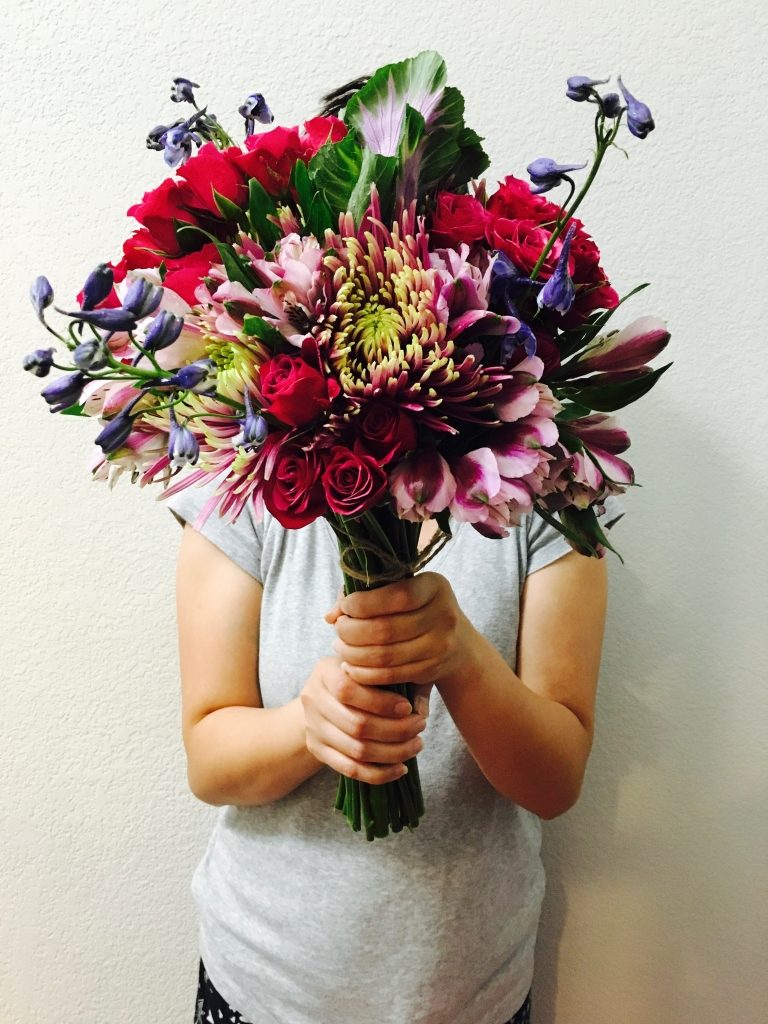
A Pretty Mix Bunch of Flowers
Flowers: (all purchased from Sam’s Club)
white hydrangeas
purple alstroemerias
pink/white charmelias
pink spray carnations
clear cylinder vase
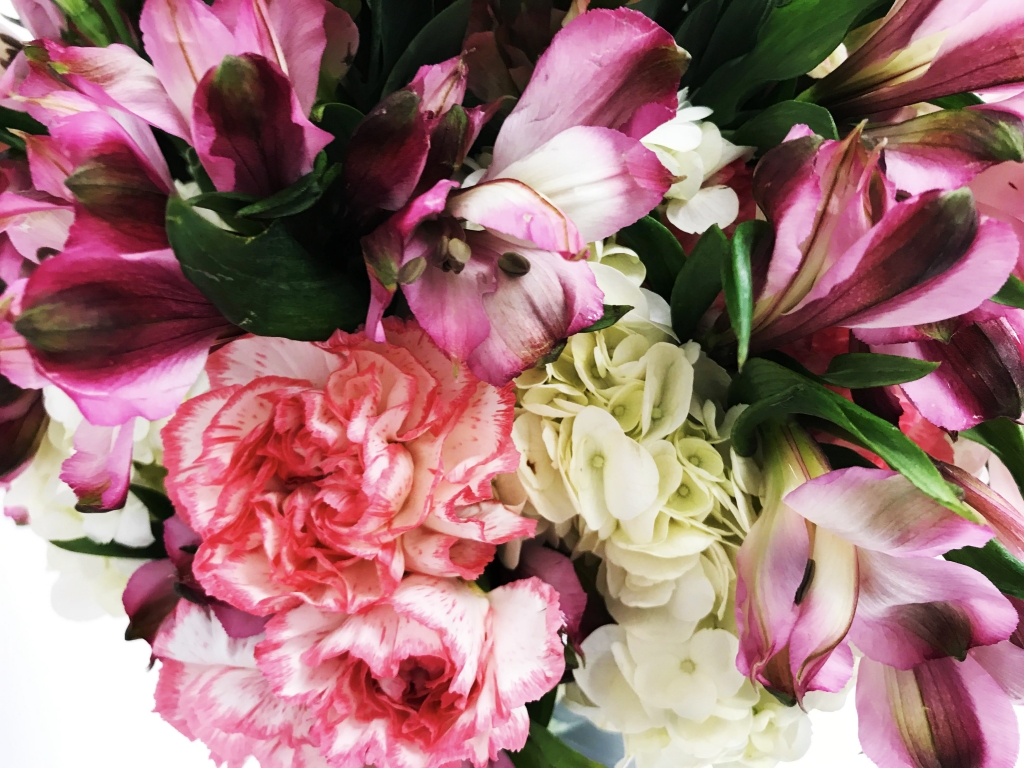
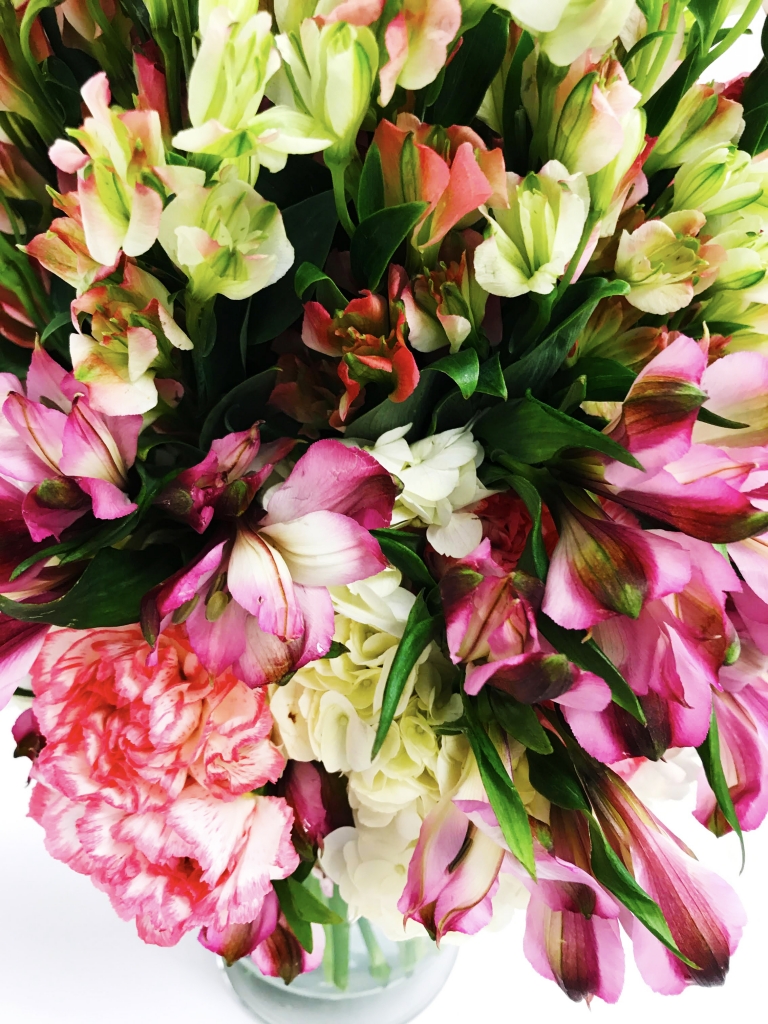
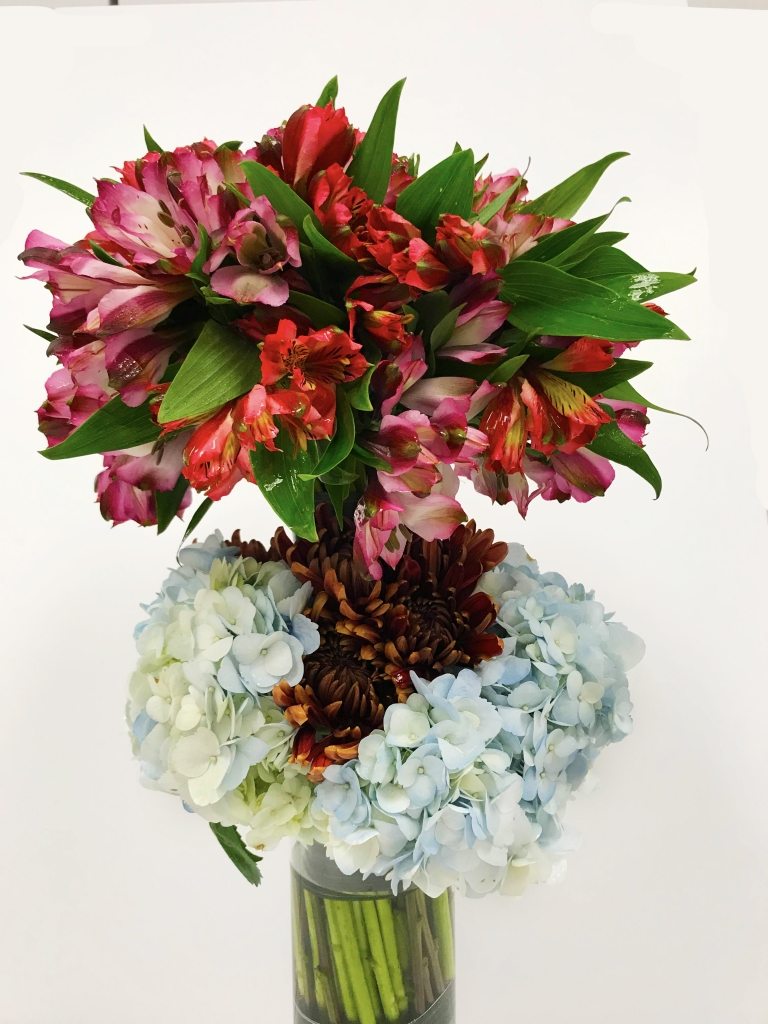
A pretty mix bunch of flowersclose upclose upclose up
Fall is finally here in North Texas after 3.5 long months of 100+ degree weather! Fall color flowers are so awesome with bold shades of orange, yellow, and red. Gear up and create one for your upcoming Fall harvest event.
I grew up my entire life in the South and would not have it any other way. I was fortunate enough have grown up on the Mississippi Gulf Coast, 1 hour east of New Orleans surrounded by a beautiful beach, an Air Force base (opportunity to meet people from all walks of life) and the best seafood in the South. Nothing beats southern hospitality with a touch of modern charm.
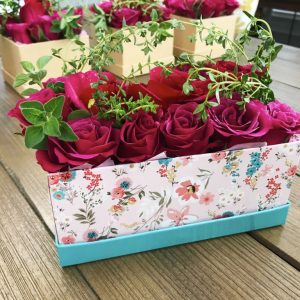
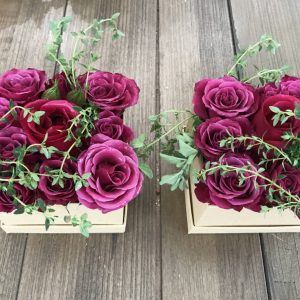
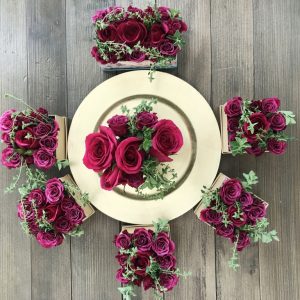
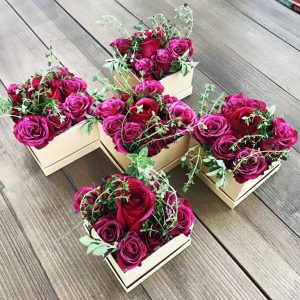
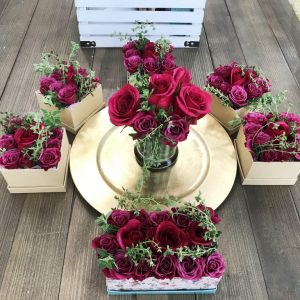
These elegant mini arrangements are very inexpensive to create. My entire cost for all 7 arrangements was around $25 excluding the free thyme, rosemary & oregano from my garden. So no excuses on creating a beautiful and inexpensive arrangement for that someone special! Enjoy!
For instruction on how to create these flowers in a box, please CLICK HEREor refer to my page titled, “Flowers Tips & Guides.”
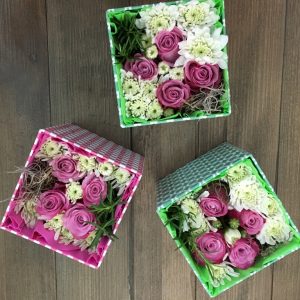
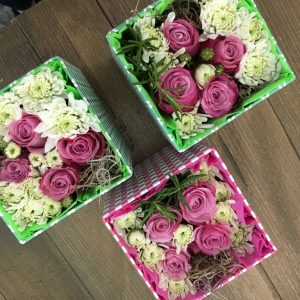
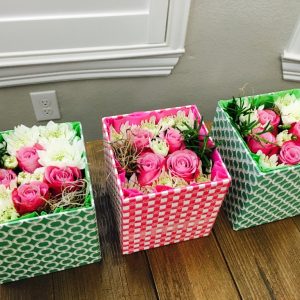
mini flowers in a box
Southern Charm flowers in a box
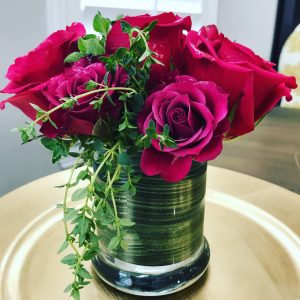
mini roses & thyme
Supplies
1 dozen of hot pink roses (Krogers)
1 bundle of hot pink spray roses (Krogers)
5 mini 3″x 3″ kraft boxes (Dollar Tree)
1 small floral print 3″ x 5″ rectangle box (Dollar Tree) – NOT SHOWN
1 block of wet floral foam (Amazon or any kraft stores)
1 pack of table vinyl (Dollar Tree)
1 candleholder vase (Dollar Tree)
thyme, rosemary & oregano (free from my garden but you can use any greenery such as holly from your flowerbed or garden as a filler)
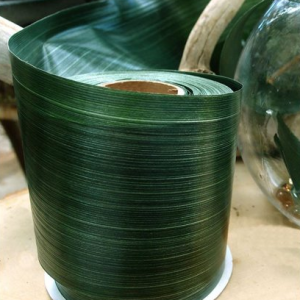
Optional: Tea leaf ribbon for lining inside of candleholder vase (Amazon or Micheals)
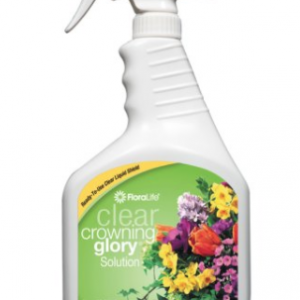
Optional: floral crowning spray to help seal the flower moisture (Sam’s Club or Amazon) or a mist with water.
Summer in Texas this year has been excruciating! The temperature has been in the 3 digits for months. My attempt to grow a flower garden has failed due to the heat and lack of rain. But on the bright side, I was able to get my herb garden started and will start blogging about it on Herbs, Garden & more page. CLICK HERE to check it out.
Even with the downfall of my flower garden this Summer, I was still able to make some awesome arrangements using grocery stores flowers. Enjoy!
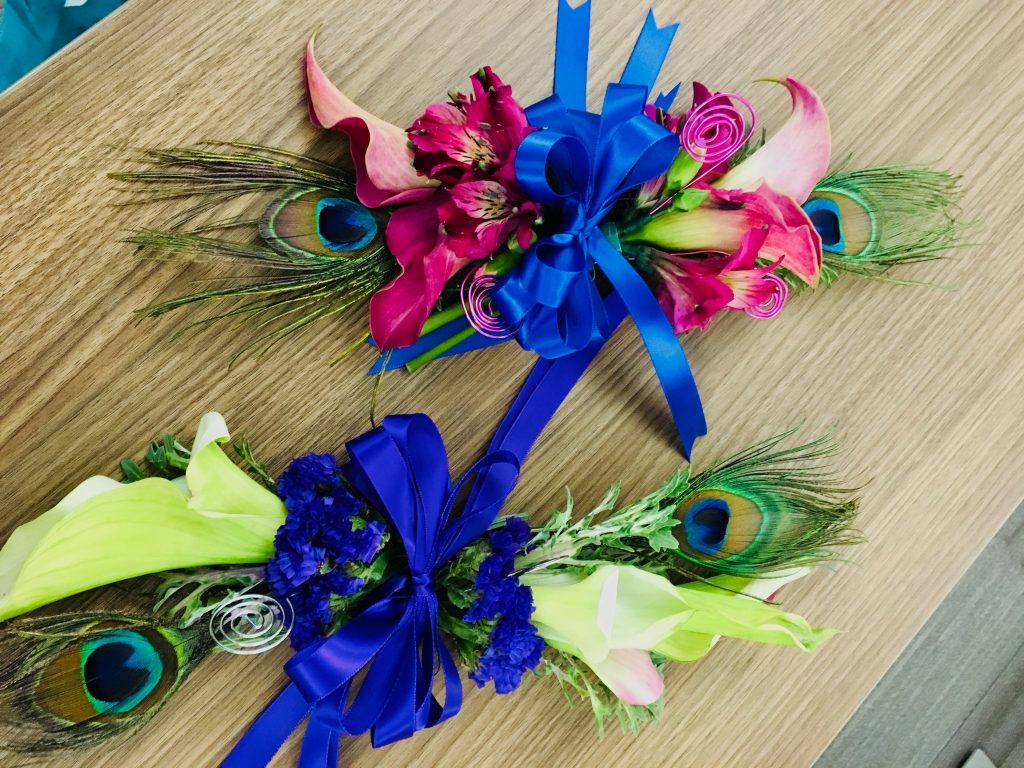
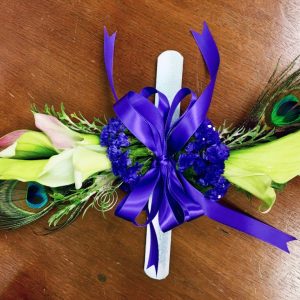
It’s prom season and what even better are beautiful elongated corsages made with calla lilies purchased from my local Tom Thumb grocery store. Lilies are in season which also make these corsages budget friendly. This is my second time making corsages since most of my creations are flower arrangements. I created these 2 corsages for a co-worker who had requested some special corsages for her son’s prom date and military ball date.
Since this was my second time making corsages, there are bound to be some complications. I had gotten a little worried when both corsages came out a little longer in length than I had envisioned. I originally had imagined 6-8 inches but both corsages came to about 10-12″ in length. But even at 10-12″ long, these corsages still manage to stay put onto the corsage slap bracelet holder. It all worked out in the end and both corsages were well loved by 2 special young ladies.
Here they are! My final Valentine’s day flower creations. I hope these flowers arrangements inspires you to create one for that someone special. Just remember, inexpensive flowers doesn’t have to look cheap!
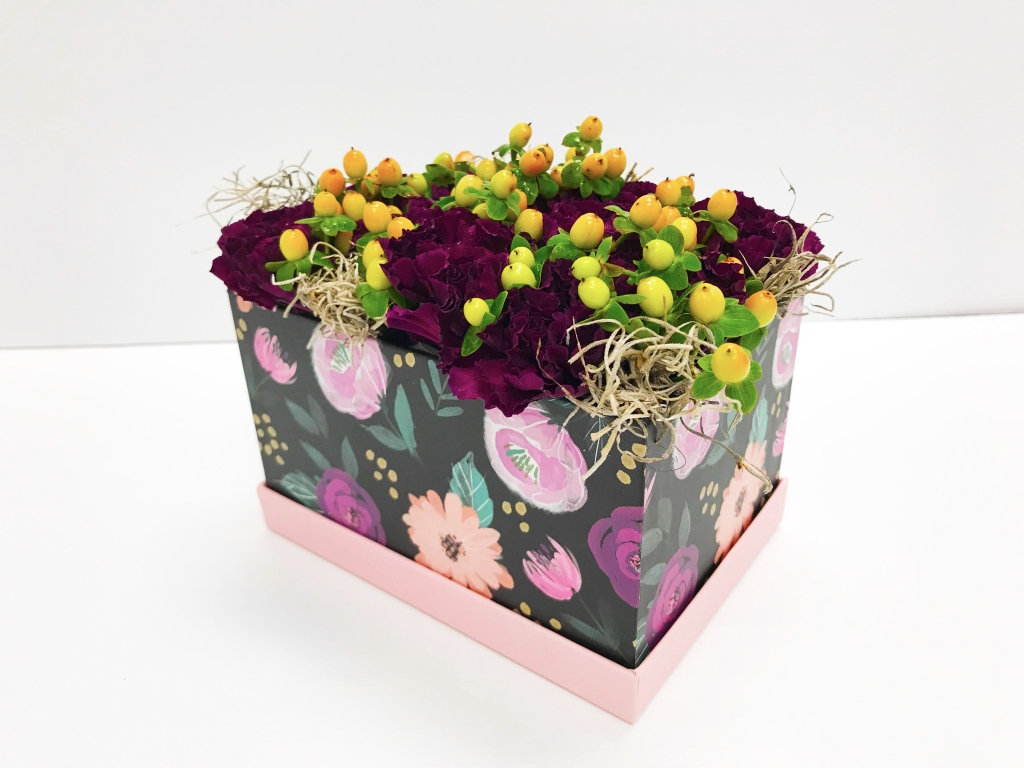
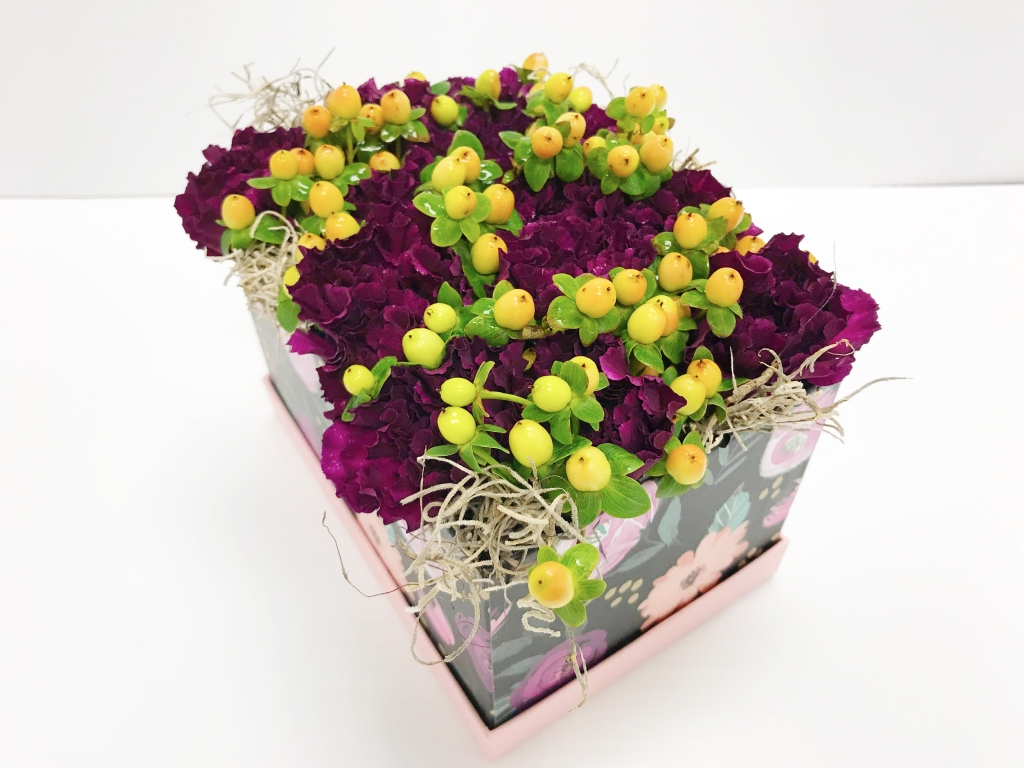
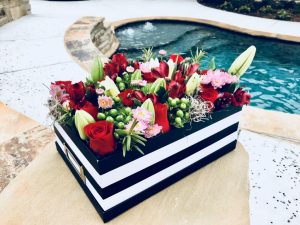
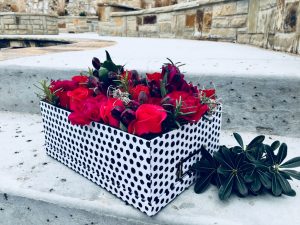
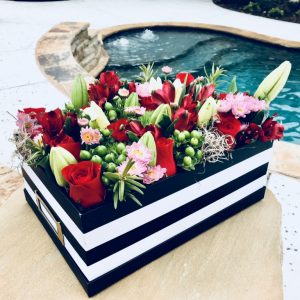
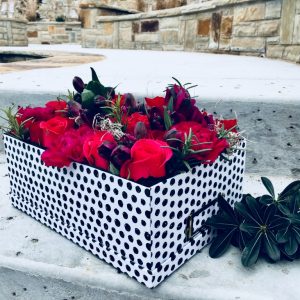
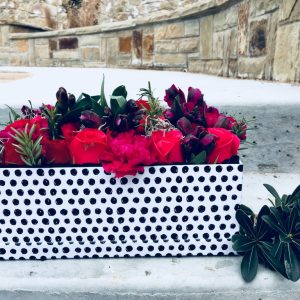
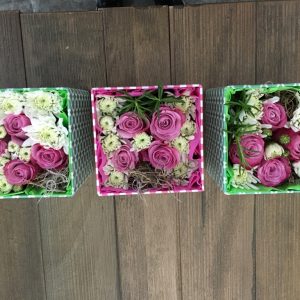
Here’s my final 2017 Holiday flower arrangement and my first 2018 flower arrangement both using my flowers in a box theme. I thought I would save time by combining both flower designs into 1 blog by ending 2017 with the start of 2018. One thing I do love doing is using bold and vibrate colors flowers within my flower creations. All flowers were purchased from my local Krogers within the Dallas, TX area and the photo boxes were purchased from Hobby Lobby.
For step by step instruction on how to creation one of these beautiful flowers in a box arrangement, please CLICK HERE for instruction sheet.
Enjoy and check by soon for my 2018 Lunar New Year flower design inspirations!
2017 Holiday/Christmas Flowers in a Box#2
side view-2018 flowers in a box design
Final 2017 Holiday/Christmas Flowers in a Box
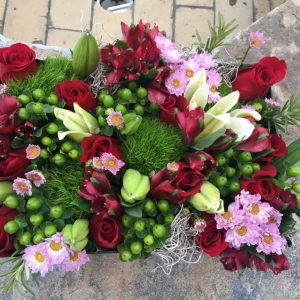
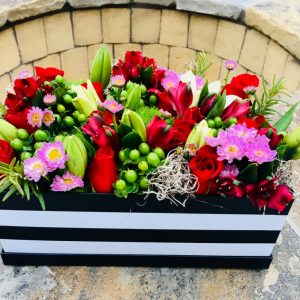
2017 Holiday/Christmas Flowers in a Box#2
top view-2017 Holiday/Christmas Flowers in a Box#2
top view-2017 Holiday/Christmas Flowers in a Box#2
top view2-2017 Holiday/Christmas Flowers in a Box#2
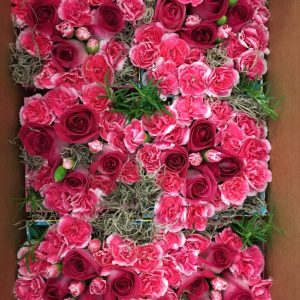
Since this is my last arrangement for the Summer, I thought I should go out with a big bang!!! Bold colored flowers are always a crowd pleaser. Only $25 dollars in cost to create for that specials someone.
Supplies Needed:
Mixed bouquet at Krogers for $12 (Includes: lavender/pink alstromerias, purple/green spider mums, kale, some kind of purple orchid fillers)
Fushia spray roses at Krogers for $8
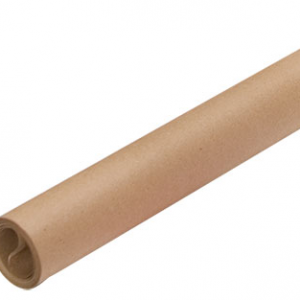
Kraft paper at dollar tree
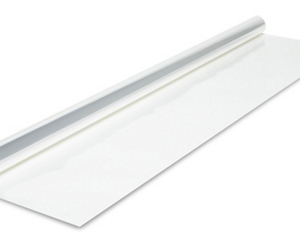
Cellophane paper at dollar tree
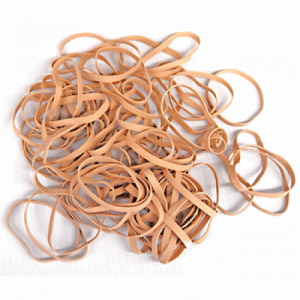
Twine or rubber bands from any craft store
Gross grain ribbon
Crowning spray to extend flower life (optional) can be purchased on Amazon or Sam’s Club.
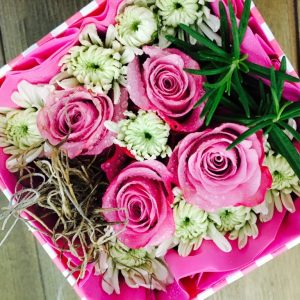
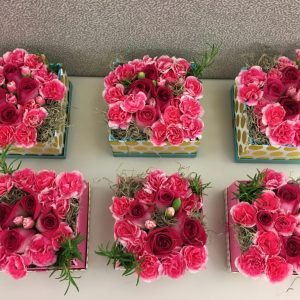
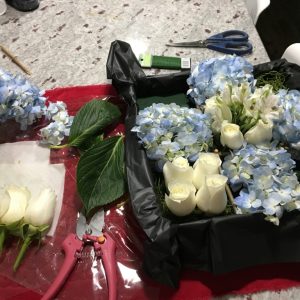
This is my first time ever making gifts for Teachers Appreciation Day. Since my son attends 2 different schools, Pre-K in the morning and Montessori at noon, I had 2 groups of Teachers Appreciation gifts to create within the same week! I ponder a bit on what to make trying to stay within budget. Then I saw these cutes boxes at Dollar Tree and thought it would be nice to make a mini version of my Flower in a Box design.
So here they are! All flowers were purchased at my local Krogers in Wylie and Plano, TX, the rosemary from my flowerbed, and the grey preserved moss from Hobby Lobby. The cost came out around $7 per arrangement.
Flowers: pink roses, white poms
Mini Teacher Appreciation Flowers
Mini Teacher Appreciation Flowers
Mini Teacher Appreciation Day arrangements
Mini Dollar Tree Gift Boxes
Mini Teacher Appreciation Day arrangements
Mini Teacher Appreciation Day arrangements
Mini Teacher Appreciation Day arrangement
Flowers: pink roses, carnations
Mini Teacher Appreciation Day arrangements
Supplies Needed:
Flowers: pink roses, carnations
Flowers: pink roses, white poms
rosemary
Mini Dollar Tree Gift Boxes
Mini Dollar Tree Gift Boxes
Wet Floral Foam
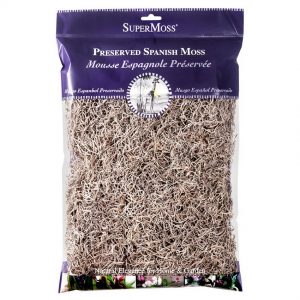
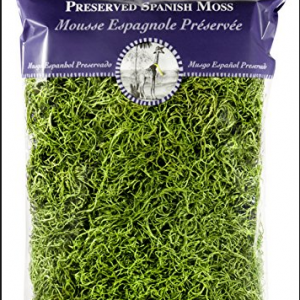
Preserved grey Spanish moss for finishing touches
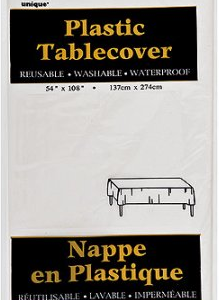
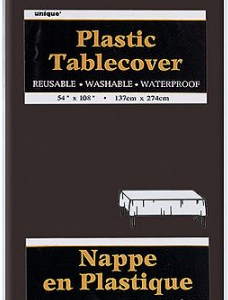
plastic table covers to line the bottom
CLICK HEREfor sample instruction on how to create the Flowers in a Box design or refer to my Flower Tips & Guide section.
Thanks for visiting my blog and and have a great day!
I must admit that making flower arrangements for baby boys are much harder than baby girls! This is probably because finding flowers in shades of blue can be a major challenge. Fear no more, here are 3 baby boy themed flower arrangements that will definitely be a hit. All flowers were purchased from my local Krogers in Wylie and Plano, Texas.
WRAPPED FLOWER BOUQUET, FLOWERS IN A BOX & WHITE FLOWERS IN A ROUND VASE
Optional: cellophane paper or use the mylar wrapping cover that was used to hold the flowers when purchased from the store.
rubberbands
2-3 paper towels soaked in water
1 sandwich size ziplock bag
clear tape
white ribbon
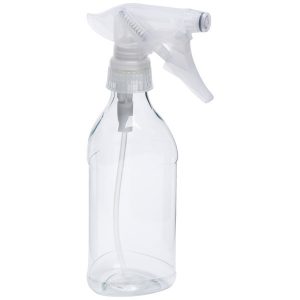
water spray bottle
Pruner
kraft paper
plastic table covers to line the bottom
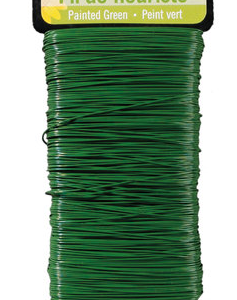
floral wire
cellophane_paper
rubberbands
spray_water_bottle
ASSEMBLING THE FLOWERS
Clean and remove all outer petals from roses and remove 50-75% of all leaves and foliage from all flower stems.
Set up your flower work space by sorting each flowers by same kind: roses with roses and carnations with carnations….etc
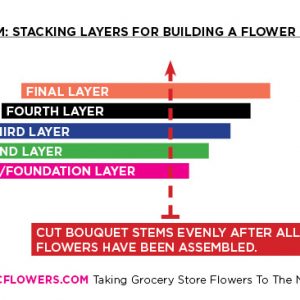
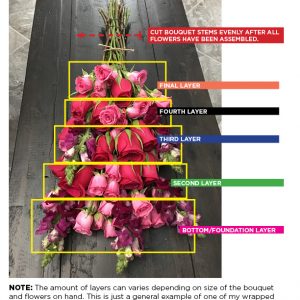
Start the bouquet by building a bottom foundation using the white alstroemerias and mini white carnations. I always use filler flowers for this step because I want the prettier flowers such as the roses to be the focal/center point.
Then select about 3-4 roses and stack them on top of the bottom layer ensuring to place the roses 1-2″ down from the very top of the previous layer. The goal is to build the bouquet by stacking and placing the flowers 1-2″ from the previous layer. (REFER TO EXAMPLES BELOW)
Keep repeating layers until you have used up all the flowers. The amount of flowers per layer will decrease as more and more layers get added.
The amount of layers will varies depending on the size of your bouquet and the amount of flowers you want to use within the bouquet.
Paper_Wrapping_Diagram layers
Stacking_Flowers_Instruction for wrapped flower bouquet
When flowers are completely assembled, use either twine or rubber bands to hold the bouquet in place.
Now cut the flower stems evenly to your desire length. I like cutting mine 4″ to 6″ from the flower base of the final layer.
Soak about 2-4 paper towels in water. Wrapped the wet paper towels around all stems of the bouquet.
Use a sandwich size bag or larger and place stem of flowers wrapped in the wet towels inside the bag in order to keep the flowers hydrated.
Optional: You can add some wet floral foam to the flower stems 1st then wrap the wet paper towels around the floral foam covering the stems. The floral foam method will keep the flowers hydrated for longer periods of time.
Use several layers of clear tape to wrap and seal the top of the ziplog bag around the bouquet.
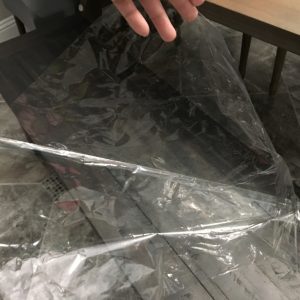
Optional: You can use clear cellophane paper or the same mylar bag from your flower purchase to make an initial flower wrap of the bouquet. This process reinforces the bouquet and catches any water that may leak out from the wet paper towels/floral foam.
mylar/cellophane flower paper
Cut part of edge away for opening of bouquet
cellophane_paper
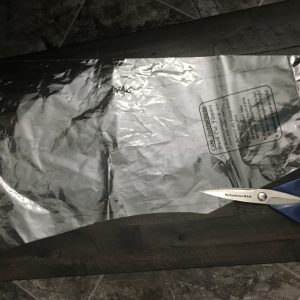
Cut 2 pieces of the table vinyl cover into a square about 1.5 times the size of the bouquet. You can cut smaller layers if wrapping around the bouquet with multiple layers.
Cut 1 long narrow piece of kraft paper ranging about 12″ in width. Then cut an additional 3 smaller pieces about 6″ in width.
REFER TO EXAMPLES BELOW for paper cutting and placement order.
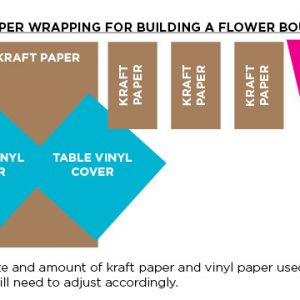
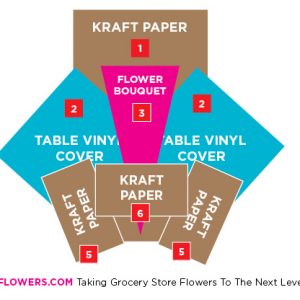
Paper_Wrapping_Diagram_paper cutting
Paper_Wrapping_Diagram steps
Wrap bouquet following the order sequin of the 2nd diagram above then use a ribbon to tie bouquet together.
Your wrapped flower bouquet is now complete.
For a final touch, spray flowers with fresh water from a bottle. This process help hydrates the flowers faster since the bouquet is not placed into a water filled vase.
IMAGE GALLERY
Baby Boy Chic Wrapped Flower Bouquet
Baby Boy Chic Wrapped Flower Bouquet
Baby Boy Chic Wrapped Flower Bouquet
Baby Boy Chic Wrapped Flower Bouquet
#1.5 – LEFT OVER FLOWER CREATION
I created this arrangement from the left over white carnations.
Cut down stems from the alstroemeria to fill in the gaps and add texture
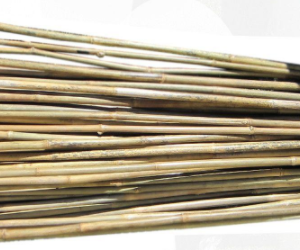
bamboo sticks to create the square grid or use the stems from the alstroemeria
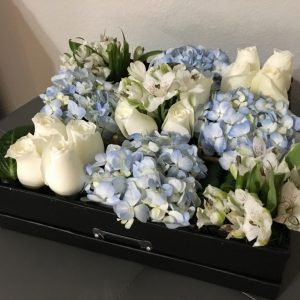
Baby Blue/White flowers
SUPPLIES
pruner
black 12×12 photo storage box
1.5 blocks of wet floral foams (ensure to use the wet and not dry versions for faux flower arrangements)
knife (to cut floral foam)
bamboo stakes cut into 4 qty 12″ sticks (can be found at home depot where the plant stakes are sold)
black plastic table covers to line photo box
floral wires
Spanish moss for filling in the gaps and holes where the floral foam is exposed
Pruner
Wet Floral Foam
Spanish Moss
12×12 photo box
floral wire
Bamboo sticks
Table Vinyl Cover
STEPS
Soak 1 block & a half block of wet floral foam for about an hour or more prior to arranging the flowers.
Line photo box with 2-3 sheets of plastic table cover. Don’t worry if the table cover extend pass the photo box because it will be trimmed at the very end.
Add the floral foam by cutting block in half (1″ height) completely lining bottom of box.
Place 2 bamboo sticks to each sides forming a 9 square grid.
Add each flowers by sticking into floral foam but ensure to keep the same kind flowers within each grid.
Roll up some large hydrangea leaves and wrap with floral wires. Add these rolled leaves to 2 of the squares within the grid.
Add Spanish moss fill in any gap or holes within arrangement.
Trim off excess plastic table covers.
Use 1.5 blocks of floral foam
Add flowers to each 9 grids.
IMAGE GALLERY
Overview
Baby Blue flowers in a box
Top view
Front view
Baby Blue/White flowers
Close up
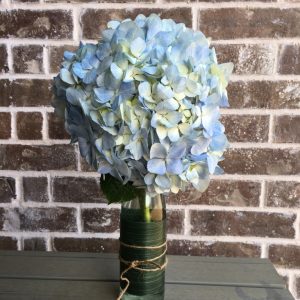
#2.5 – LEFT OVER FLOWER CREATION
I created this arrangement from the left over blue hydrangea.
2 blue hydrangeas
empty soda bottle
asipdistra tea leaf ribbon to wrap bottle (I bought this on Amazon)
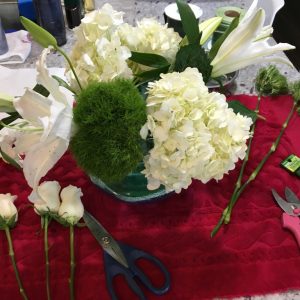
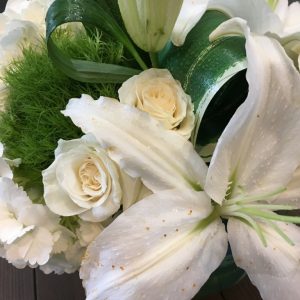
I always pick the biggest flowers (white hydrangeas) to arrange first in order to set the stage.
Next add the flowers with the most height which were the white lilies.
Fill in the rest of the flower base with the green tick balls.
Now add the white roses in groups of 3’s and place near the green tick balls.
At this point you can call it quite but I felt it needed more WOW so I added the cypress branch (I think it’s call this!) and the aspidistra tea leaves to fill in the gaps around the top.